Adding a new Amazon SES delivery server (Web API)
Adding a new Amazon SES delivery server (Web API)
This article will drive you through the steps on creating and validating an Amazon SES delivery server.
First of all you have to create an account here.
Once you are done and you are logged in, you should search for the Simple Email Service

The Simple Email Service landing page should look like this:

Then, you need to confirm your sender identity.
There are 2 ways: using domain or email address.
Newsletters App uses email addresses for sender identity, so you will need to validate an email address not a domain:

The process of Verify a New Email Address is pretty straight forward, you add your new email address and then you have to verify it. You will receive an email containing a verification link in the inbox of the email you wish to verify.
Next step would be to create a IAM user and give it proper permissions so it will be able to send emails using SES.

Click on Add user button.
Select a user name and check the box for Programmatic access.

Next step will be to set the user permissions. You can assign the user to a group that will have the necessary permissions or you can directly assign the policies to the user. A minimum policies combination would be:

To be sure that you will have all the necessary permissions to send emails or if something is wrong, use PowerUserAccess policy.

After you create the user you will have to save the Access Key ID and the Secret Access Key. You will need these when you will setup the delivery server in Newsletters App.

The next step will be to go to your SES home page in the dashboard and to access SMTP Settings. You will need to note down the Server Name since you will need it inside Newsletters App setup.

We are done with the Amazon SES setup. After completing these steps we will need the following info for the Newsletters App setup part:
- Access Key ID
- Secret Access
- Server Name
- Confirmed SES email address
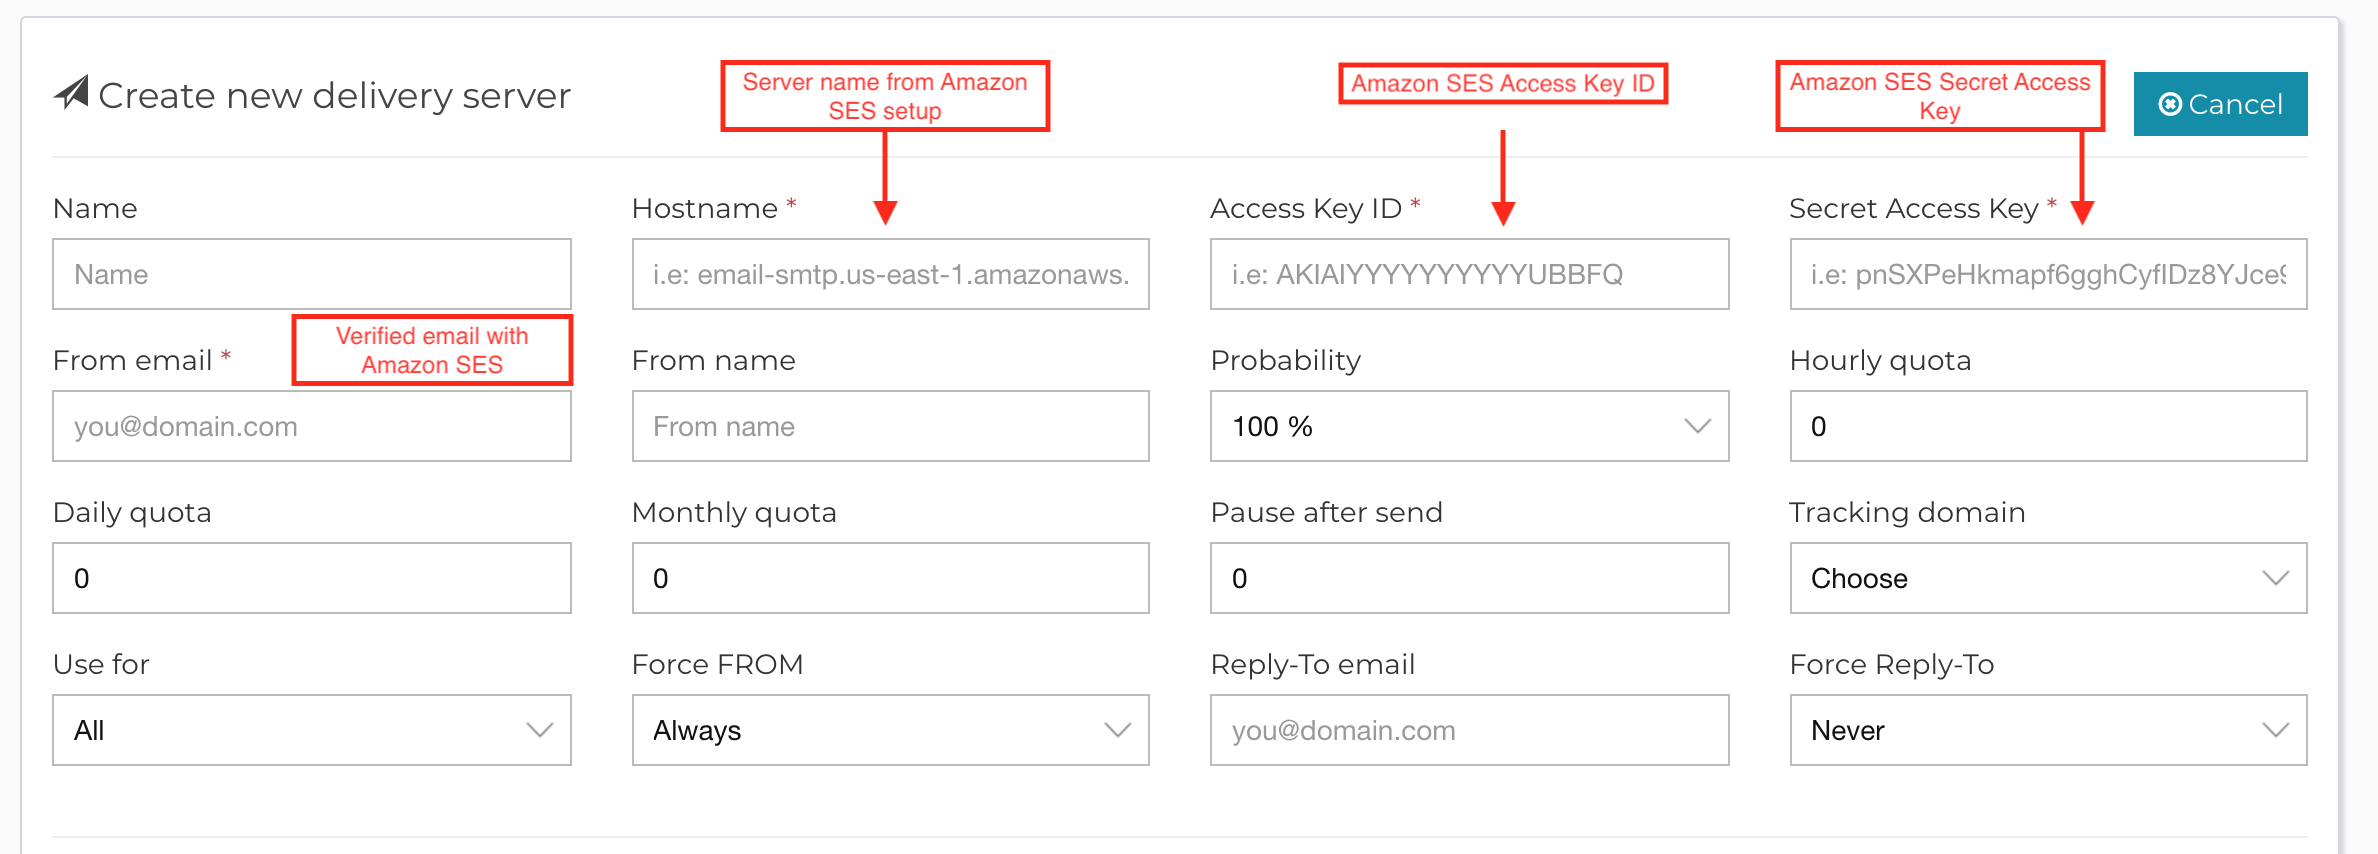
Inside you Newsletters App app, navigate to Servers > Delivery Servers page, click create new one and choose the Amazon SES Web Api:
Here you will need to fill in the info that you noted from the Amazon SES setup steps:
Save the form and then you will need to verify your server. In the verification step you should enter a valid email address where you will receive an email containing the verification link.
NOTES:
– In case you have a firewall on your VPS, remember to add exceptions in its rules for the AWS IP addresses in order to allow Amazon SES to post bounces to Newsletters App.
– If for any reason you need to edit the SNS subscriptions, make sure that the Raw Message Delivery is Disabled for the subscription.
That’s it! You are ready to send emails.